Thin Client Flashing and Installation Guide
Note: For factory-original thin client devices, end-users do not need to perform installation operations. They only need to configure the xSpace management component address according to the requirements of the IT administrator or O&M personnel, referring to the access settings instructions, to log in from that thin client device and use their personal cloud desktop resources.
The installation steps described in this document are for scenarios where flashing and installation are performed from scratch on an original terminal device. This will involve reinstalling the base operating system on the thin client device, followed by the installation of the xSpace client software package. The flashing process will format the storage medium on the thin client device, and no original data information on the thin client will be retained.
1. Overall Installation Approach
The thin client deployment process can be summarized into the following four core stages:
-
1.1 Operating System Installation: Install the base OS on the terminal via an ISO image.
- Special Case: RK3568 terminals use the vendor-provided
RKDevToolflashing tool to flash a specific.imgimage onto the terminal storage.
- Special Case: RK3568 terminals use the vendor-provided
-
1.2 Upload Installation Resources: Upload the
depends.binoffline dependency package (optional), theatos-installerscript, and the corresponding Linux client.debinstallation package to the terminal system. -
1.3 Environment Dependencies and Customized Installation:
- For Intel x86 / LoongArch 3B6000M / RK3568, the corresponding offline dependency package (
depends.binfile) needs to be run first. Other types of terminals need to have internet access for online installation. - Run the
atos-installerscript, which will automatically perform system slimming customization, install the client, and switch to "Kiosk Mode".
- For Intel x86 / LoongArch 3B6000M / RK3568, the corresponding offline dependency package (
-
1.4 Automatic Restart and Configuration: The system automatically restarts after installation, enters Kiosk mode, and can be used after configuring the management component address.
2. Preparatory Work
2.1 Hardware and Tools
- Terminal to be Flashed: Thin client device and matching power supply.
- Installation USB Drive: At least 8GB capacity (recommended to use a USB 3.0 compatible drive for improved speed).
- Burning Tool:
- When burning on Windows, Rufus is recommended.
- On MacOS, balenaEtcher is recommended.
- RK3568 Specific:
RKDevTool_Release_v2.81flashing tool and matching data cable (dual USB-A interface USB cable).
2.2 Software Resource Mapping Table
Please obtain corresponding resources from the version release directory according to the terminal processor architecture (path: Thin Client/Corresponding CPU Model):
| Processor Architecture | Recommended Operating System (ISO/IMG) | Offline Dependency Package |
|---|---|---|
| Intel/AMD x64 | xubuntu-24.04.2-minimal-amd64.iso |
Required to Install |
| Zhaoxin (x64) | uos-smart-20-TC-amd64-general-jade_dev-1.1-k5...iso |
None (Online installation with network) |
| Loongson 3B6000M | Loongnix-20.7-livecd-kde-3b6000m-0916.loongarch64.iso |
Required to Install |
| Phytium E2000Q | Kylin-Desktop-V10-SP1_2403-Industry-Release-JWIPC...iso |
None (Online installation with network) |
| RK3568 | T468_RK3568-C1-LD10-V5.0B-20241029-16g.img |
Required to Install |
atos-installer: Located in the root directory of the releaseThin Client(version number in the file name is subject to actual release).- Client installation package: Located in the release directory
Client/Linux.
3. Installation Steps
3.1 Create Installation USB Drive
Use Rufus or Etcher to burn the operating system image for the thin client onto the installation USB drive.
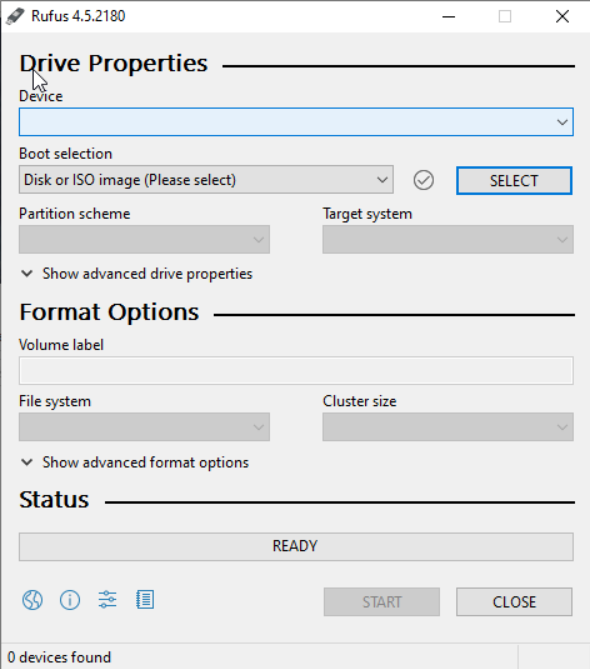
For example, the configuration interface for burning with Rufus on Windows is as follows:
⚠️ Risk Warning: Burning and subsequent flashing operations will format the storage medium. All original data on the USB drive and thin client will not be retained. Please be sure to back up important data before proceeding.
3.2 Base System Installation
- Insert the prepared USB drive into the terminal (it is recommended to insert it into a blue USB 3.x port for optimal read/write performance).
- Restart the thin client, and during the BIOS startup phase, press the hotkey (e.g., F12, ESC, etc., depending on the model) to select booting from the USB drive.
- Enter the OS installation process and complete the base system installation according to the screen prompts.
- RK3568 Users: Please refer to the hardware manufacturer's manual and use the
RKDevToolflashing tool to flash the.imgimage mentioned above to the terminal via a data cable.
- RK3568 Users: Please refer to the hardware manufacturer's manual and use the
3.3 Deploy xSpace Environment
Enter the installed system terminal and perform the following operations:
Step One: Install Offline Dependencies (Only for architectures requiring dependencies)
If the environment cannot access the internet, please first execute the dependency package for the corresponding architecture.
# File name is subject to the actual name in the release version
sudo bash ./xxx_depends-xxx.bin
Step Two: Execute Automated Installation and Customization
In the system terminal, use the installer script to complete system customization with one click.
# Version number is just an example, please refer to the actual atos-installer file name in the release directory
sudo bash atos-installer-1.x.x.bin -- -p at-xspace_linux_{cpu_arch}_{version}.deb
Note: The script will automatically complete OS slimming, Kiosk mode configuration, and install the Linux client.
3.4 Initial Configuration
After the script execution is complete, the system will automatically restart.
After restarting, the terminal will directly enter the xSpace login interface. For first-time use, please configure the cloud platform address according to the interface prompts. After configuration, you can log in from this terminal and use the cloud desktop resources under your personal account.