Automatic Domain Join
The automatic domain join feature allows cloud desktops to automatically join the enterprise's Active Directory (AD) domain environment during creation. After joining, the cloud desktop will be centrally managed by the domain controller, and users can log in with domain accounts.
Core Advantages of Automatic Domain Join:
- Improved Efficiency: Avoids manual domain joining by O&M personnel during batch desktop delivery, greatly reducing workload.
- Consistency Assurance: Ensures that all desktops successfully join the domain through automated processes, preventing security or permission loopholes due to omissions.
1. Restrictions and Preparatory Work
Before configuring automatic domain join, please confirm that the following conditions are met:
- System Support: Currently only supports Windows 10 and Windows 11 desktops.
- Pool Type Support: Only Dedicated Desktop Pools and Dynamic Desktop Pools support automatic domain join.
- Key Components: Automatic domain join highly relies on the collaboration between the Mole agent and the management component. It must be ensured that the Mole version in the image meets the requirements and correctly points to the management component.
2. Operation Steps
2.1 Environment Preparation
-
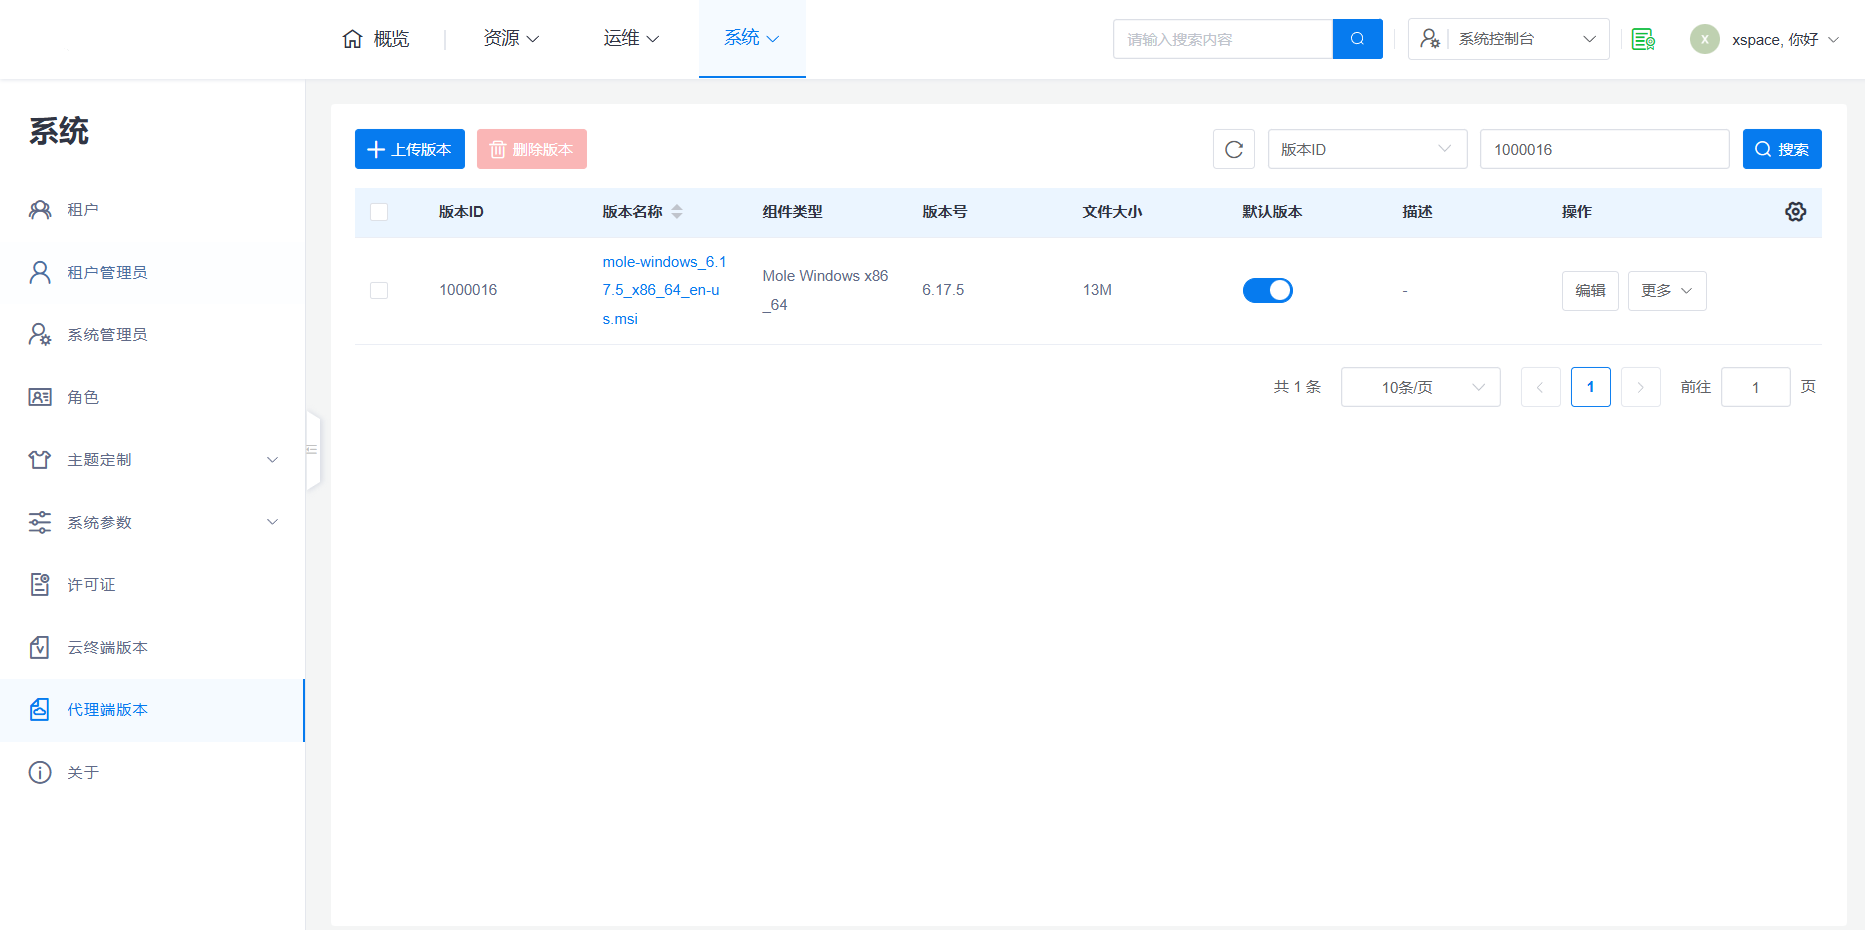
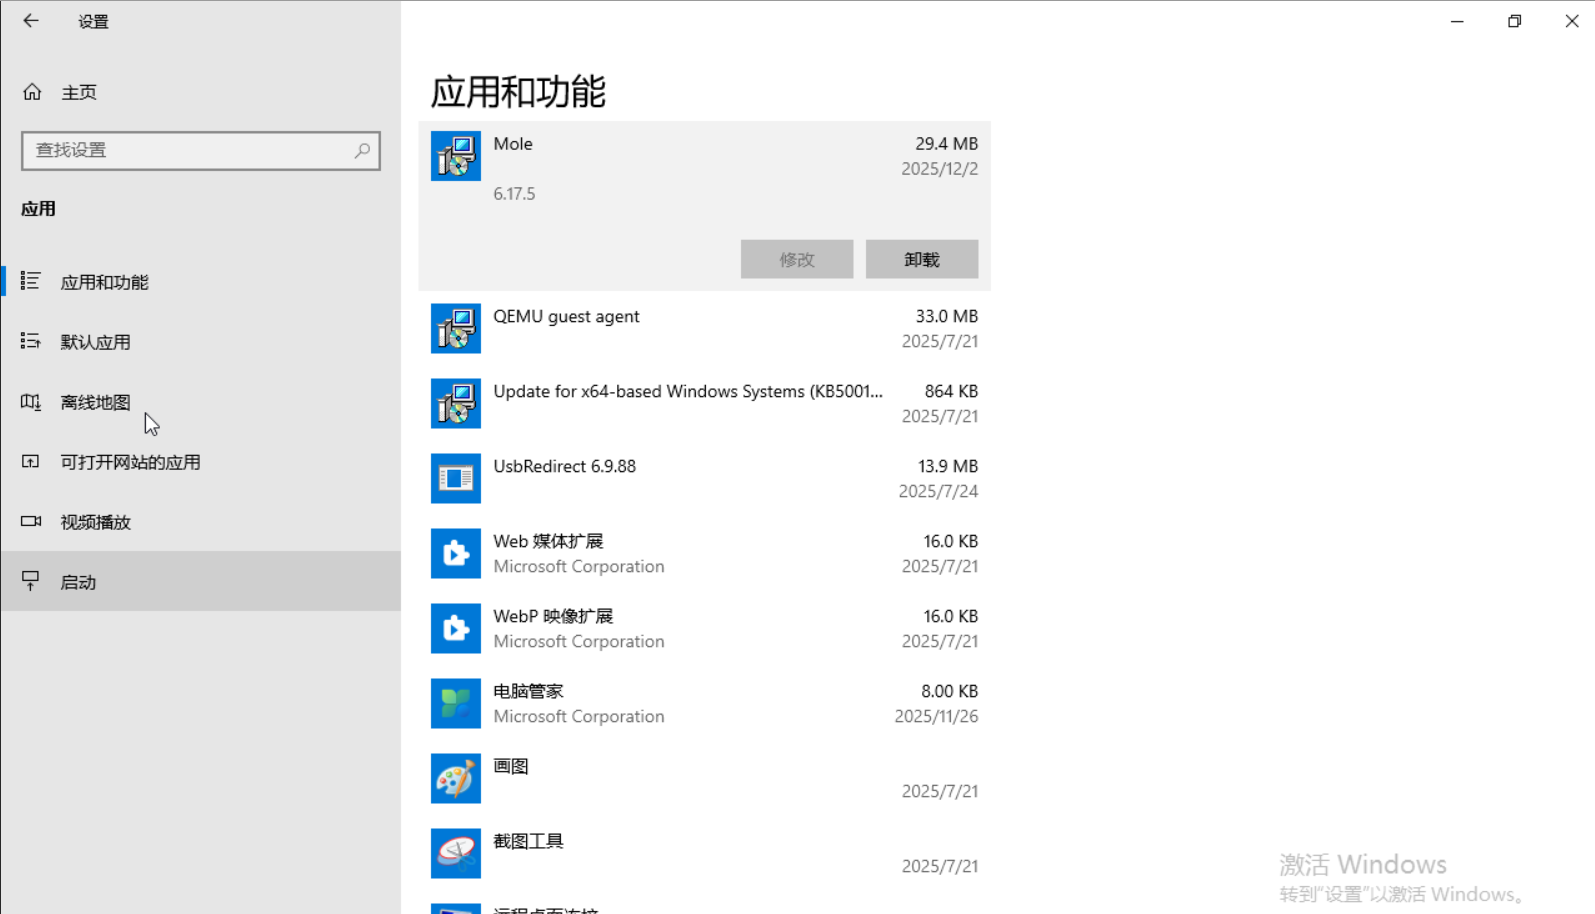
Upload Mole Agent: Log in to the system console, go to the "System -> Agent Versions" page, upload Mole version >=6.17.4, and set it as the default version.
-
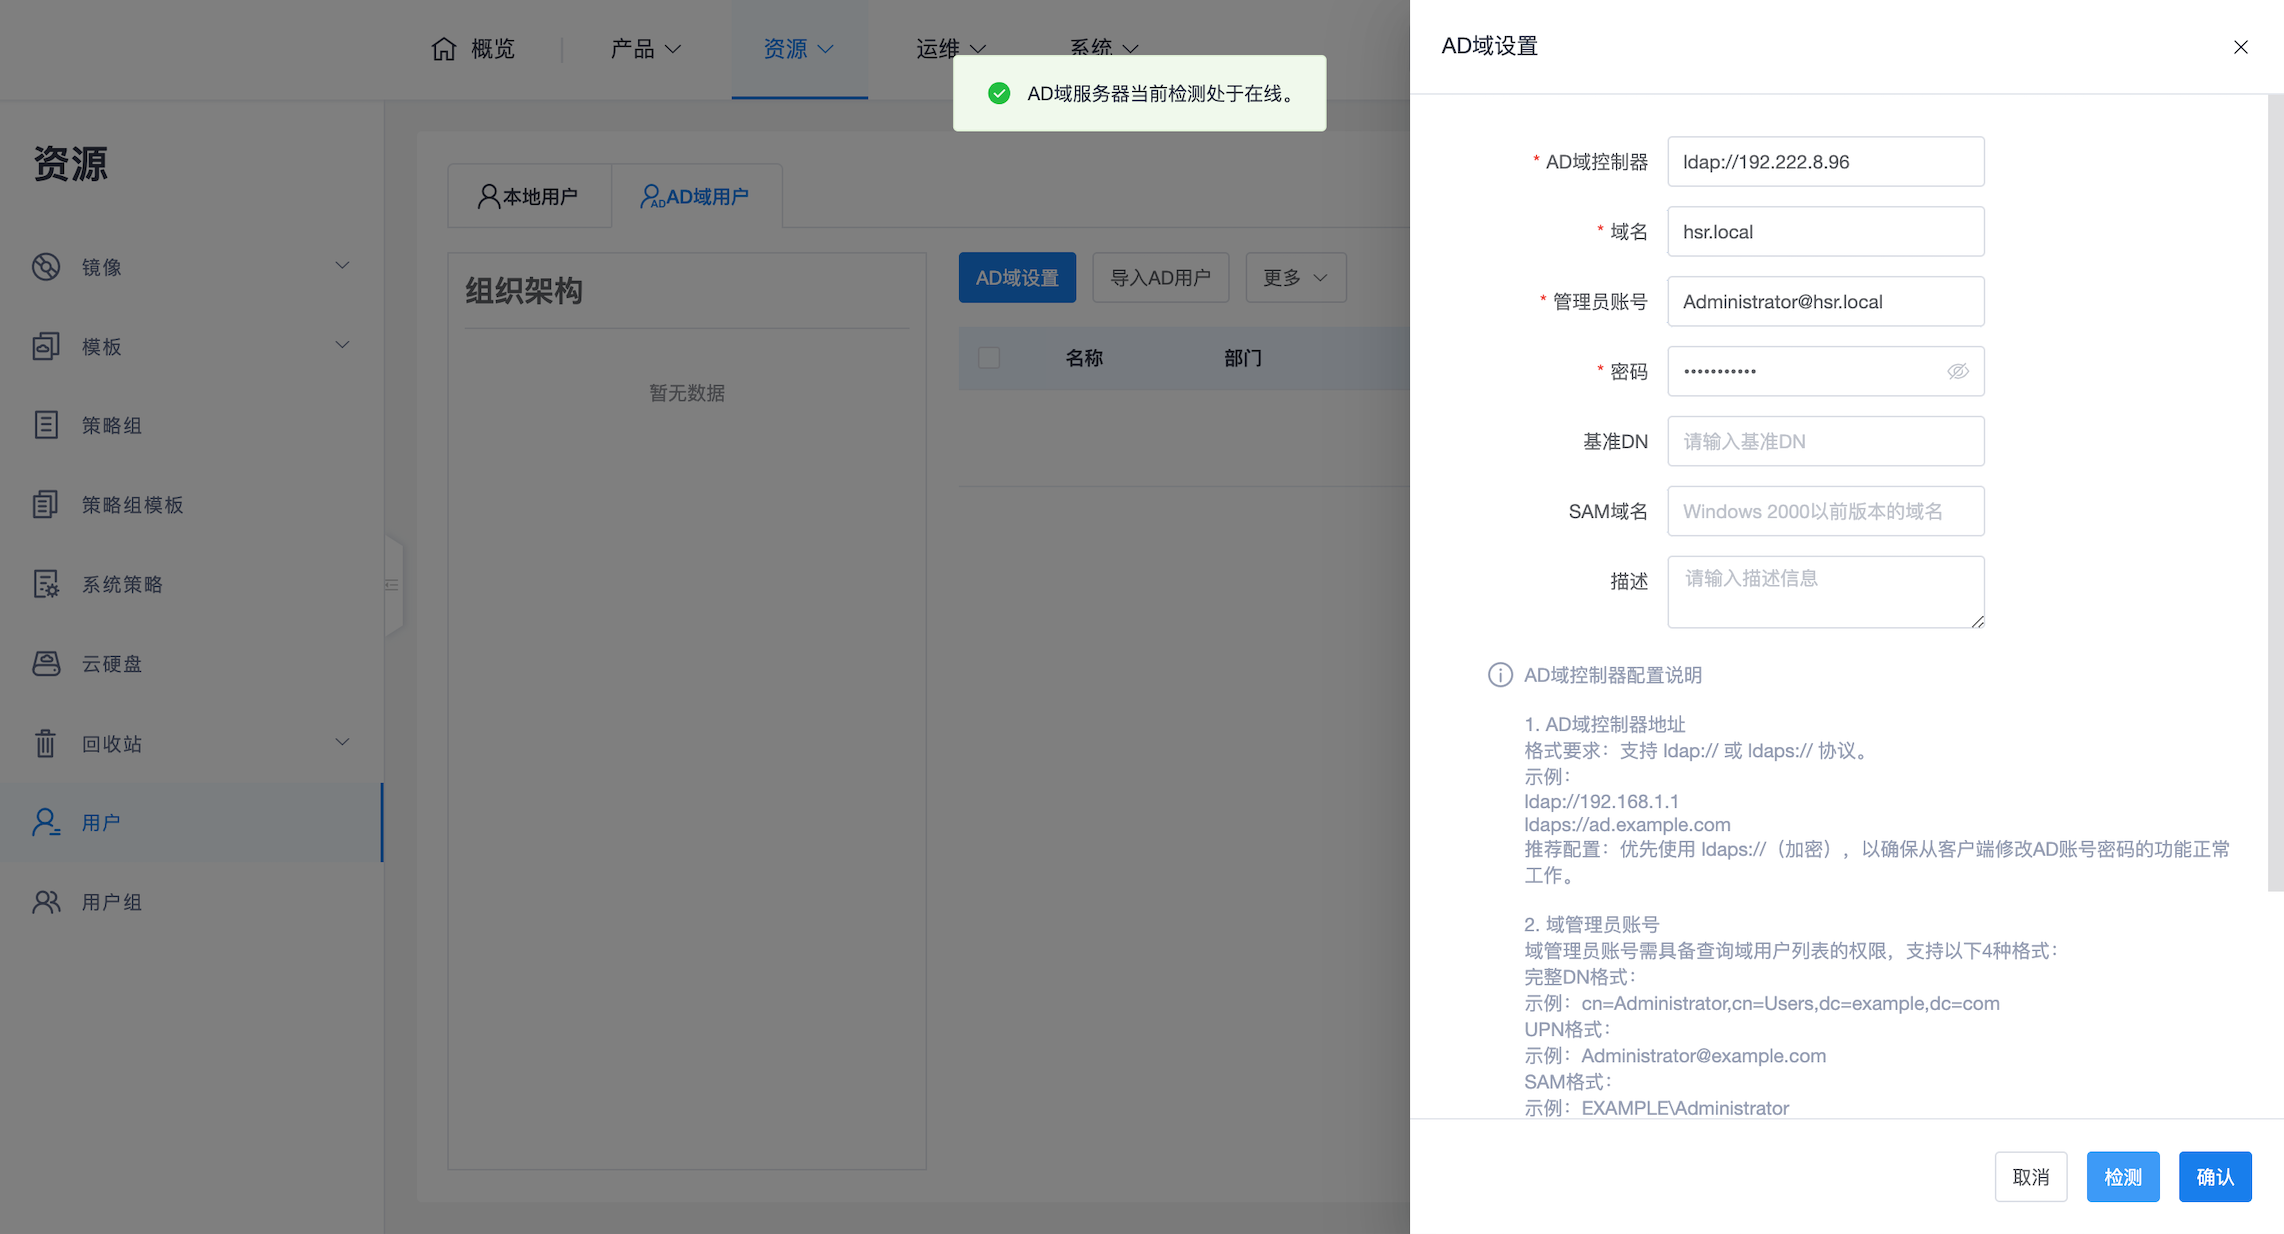
Configure AD Domain: Log in to the tenant console, go to the "Resources"-> "Users" page, ensure the AD domain is correctly configured, detected, and saved.
2.2 Create Domain-Join Specific Image
Creating an image capable of automatic domain join is the most critical part. Please follow these steps on a dedicated desktop (master machine):
If the corresponding cloud platform does not support images, the concept of an image here is equivalent to a template.
-
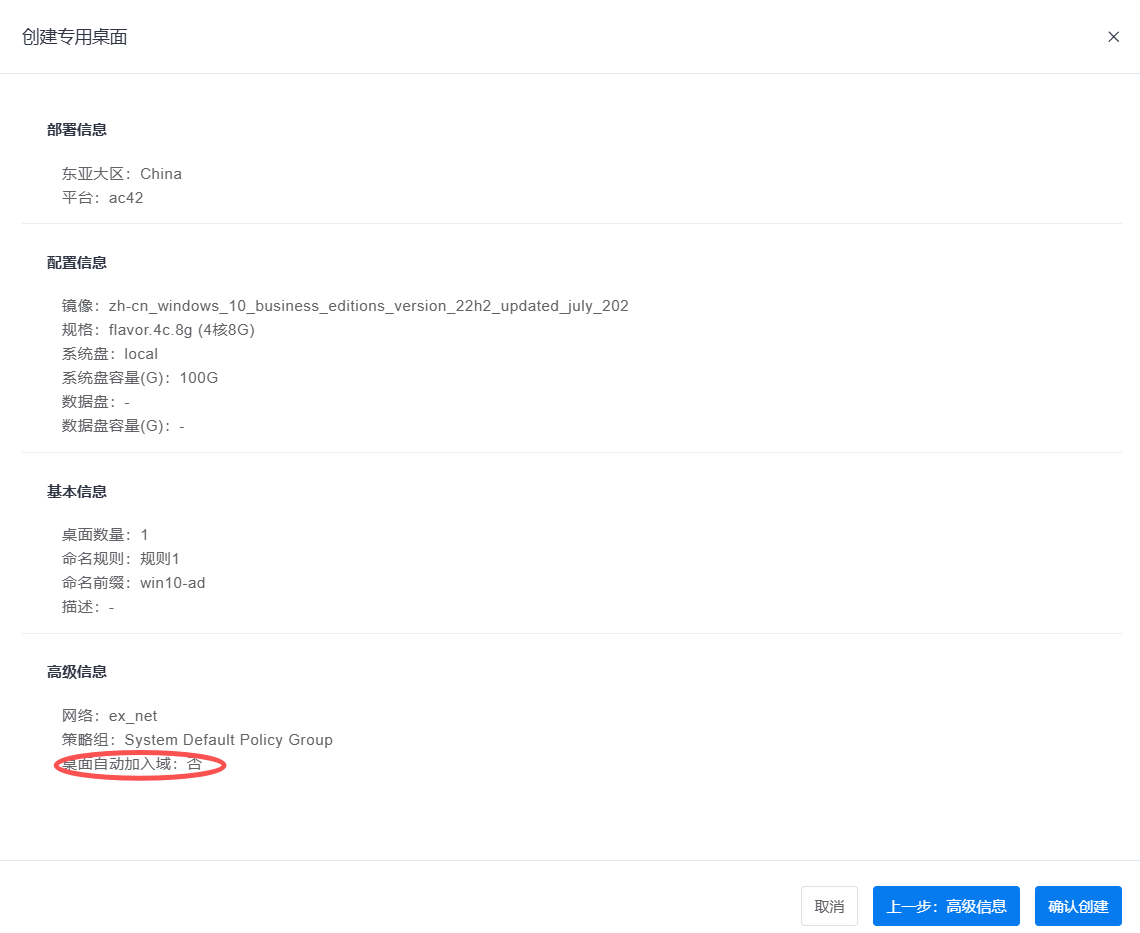
Create Master Desktop: In the tenant console, create a Windows 10 or Windows 11 desktop (do not set it for automatic domain join) to prepare for image creation.
-
Master Desktop Internal Configuration:
- Network Configuration:
- The desktop must be able to dynamically obtain an IP address (DHCP).
- Important: The desktop's DNS1 address (not DNS2) must point to the AD domain controller (statically configured or obtained via DHCP).
-
System Status:
- Ensure the desktop is in a non-domain-joined state.
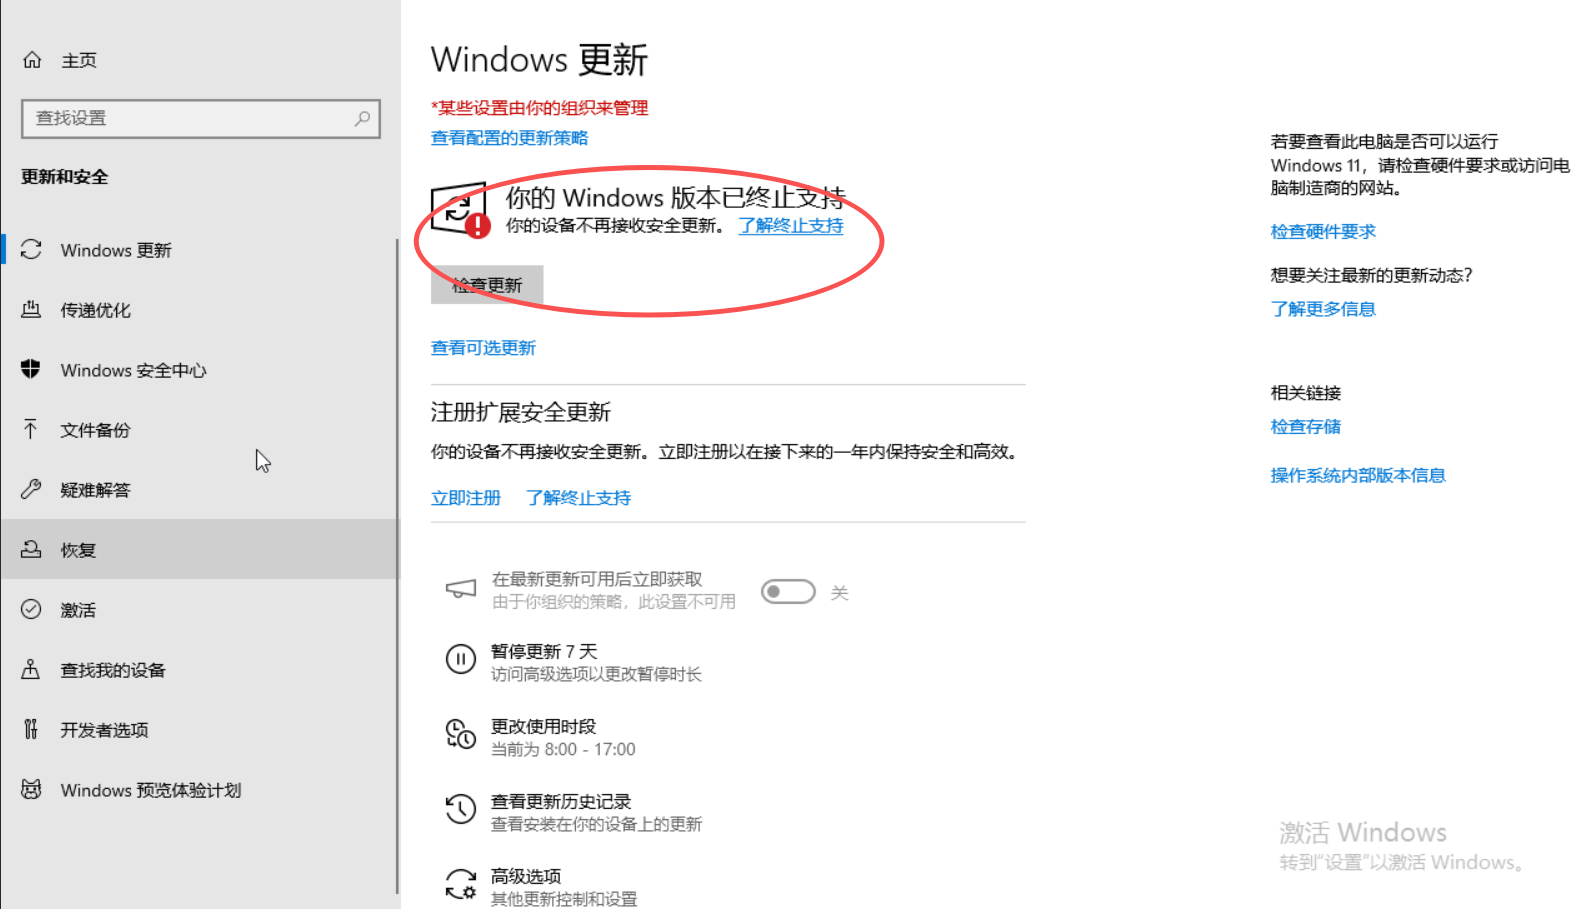
- Windows updates are clean, with no pending installation items.
-
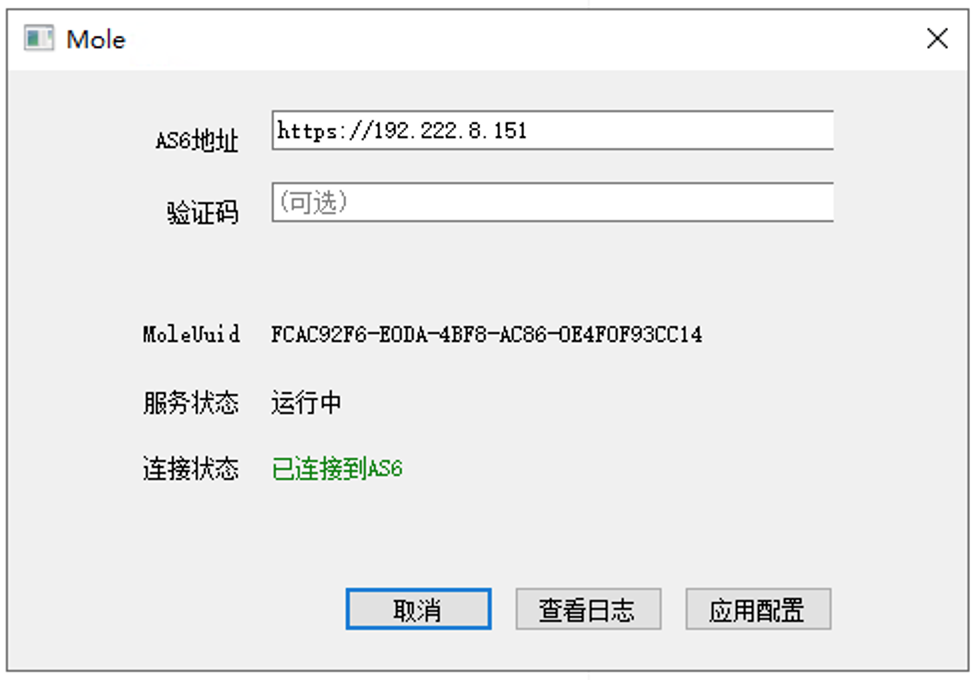
Agent Configuration:
- Mole version upgraded to >=6.17.4.
- Configure Mole to correctly point to the management component.
-
Win11 Special Handling: If creating a Windows 11 image, you must open Command Prompt (CMD) with administrator privileges and execute the following command to remove pre-installed packages that may cause Sysprep to fail:
bash
powershell -ExecutionPolicy Bypass -Command "Get-AppxPackage -AllUsers | Where-Object { $_.Name -like \"*Microsoft.Ink.Handwriting.Main*\" } | Remove-AppxPackage"
- Network Configuration:
-
Create Image: After configuration, there are two ways to generate an image:
- Created by Tenant: Directly create a "custom image" based on this desktop in the tenant console.
- Created by System: Save this virtual machine as an image in the underlying cloud platform, then return to the system console's cloud platform to "Synchronize Image" to synchronize the newly created image as a "system image" for use by multiple tenants.
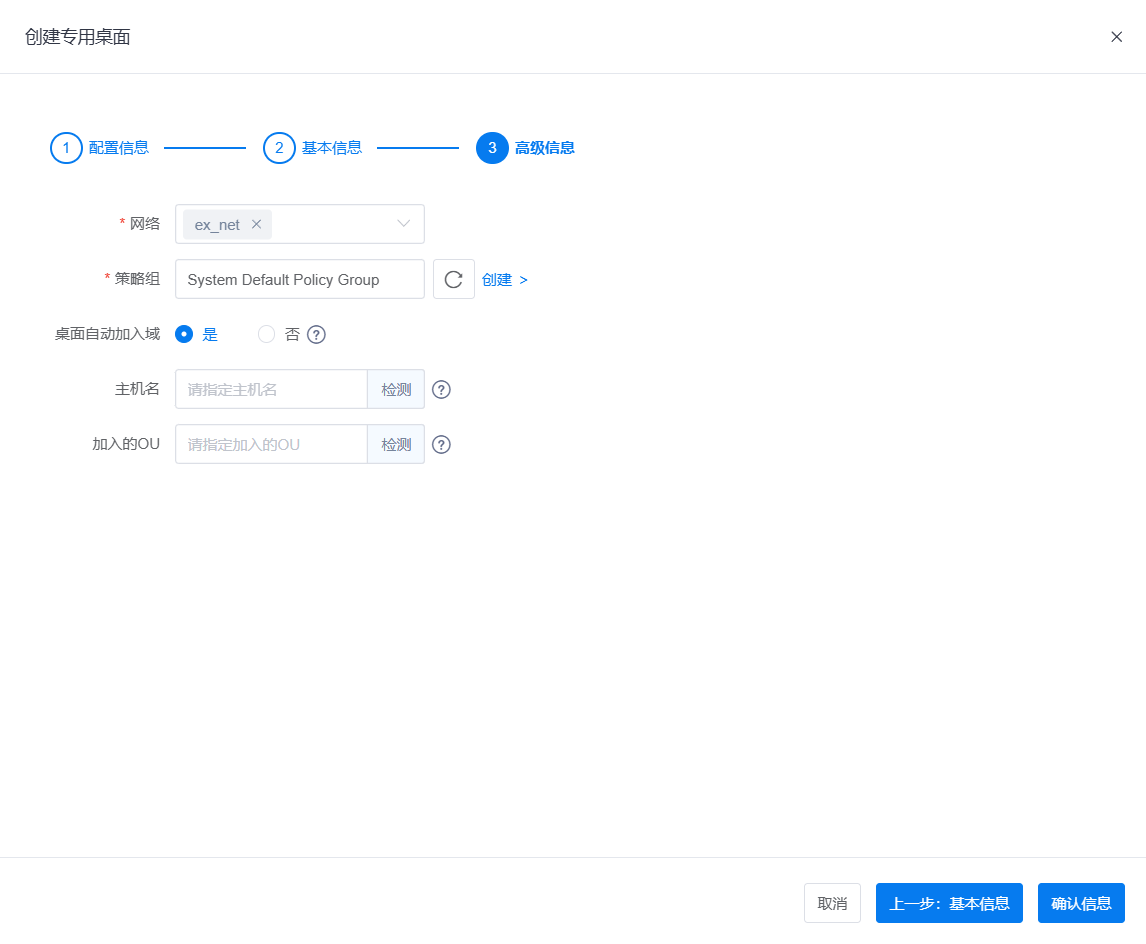
3. Create Cloud Desktop with Automatic Domain Join
When creating a cloud desktop or template using the above image, check the "Automatic Domain Join" option.
3.1 Hostname
- Single Creation: Supports manual specification of hostname. It is recommended to click "Detect" to check if the format is correct or if there are conflicts.
- Batch Creation: Does not support manual specification. The system will automatically generate hostnames in
WIN-xxxxxorDESKTOP-xxxxxformat (length not exceeding 15 characters). - Create Template: Does not support specifying hostname.
For single creation:
For batch creation:
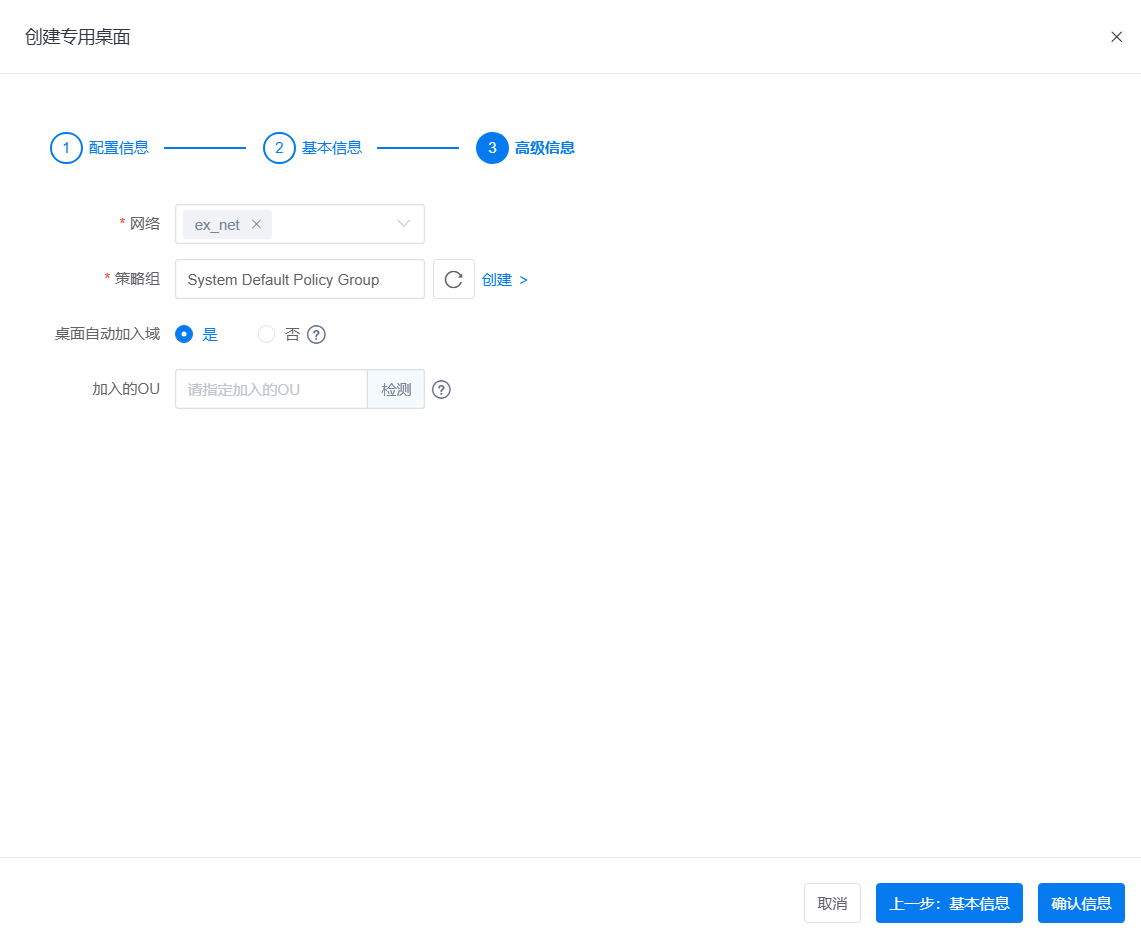
3.2 Organizational Unit (OU)
- Optional. If left blank, the system defaults to joining the desktop to the
Computerscontainer of the AD domain. - After filling in, you can click "Detect" to check if the OU path exists.
3.3 Confirm Domain Join Success
After the cloud desktop is successfully created, check the system information in the cloud desktop's console after a period of time. A display similar to the following indicates successful automatic domain join:
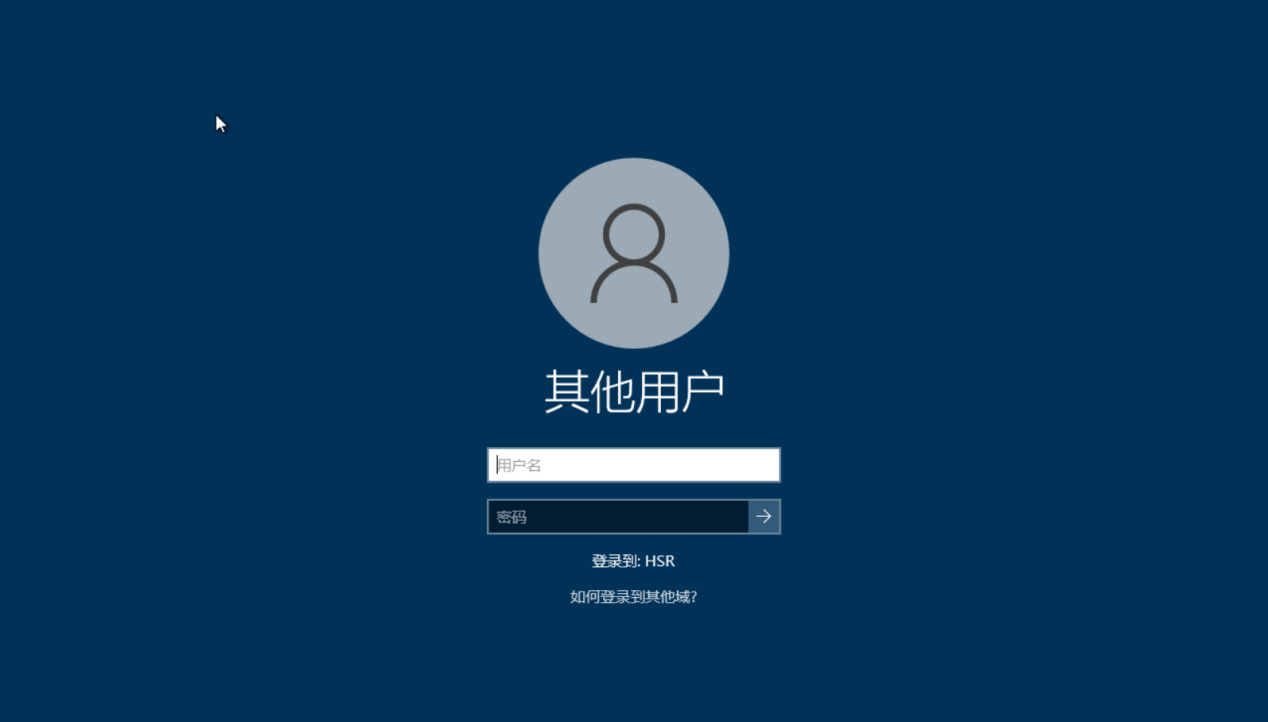
Note: The startup and execution process of automatic domain join takes a certain amount of time, during which the system will automatically restart. Please wait patiently.
4. Help Support and Troubleshooting
If the desktop fails to join the domain successfully for a long time after creation, please troubleshoot according to the following steps:
4.1 Simulate Sysprep Check
Automatic domain join relies on Windows' Sysprep mechanism. On the master machine, execute with administrator privileges:
C:\Windows\System32\Sysprep\sysprep.exe
Note: It's
sysprep.exe, notsysprep.bat.
Select "Enter System Out-of-Box Experience (OOBE)", check "Generalize", and select "Restart":
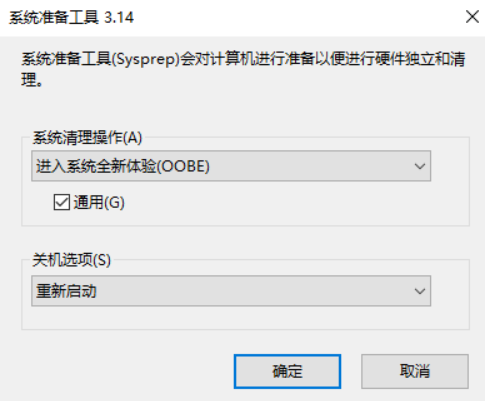
If an error is reported, analyze the log C:\Windows\System32\Sysprep\Panther\setupact.log.
4.2 Simulate Script Check
Try manually running the domain join script to see if it reports an error:
Execute C:\Program Files\Mole\scripts\joinDomain.bat with example parameters:
# Basic Domain Join
joinDomain.bat -d example.com -u Administrator -p password

# Specify Hostname and OU
joinDomain.bat -d example.com -u Administrator -p password -c myhostname -m "ou=test,dc=example,dc=com"
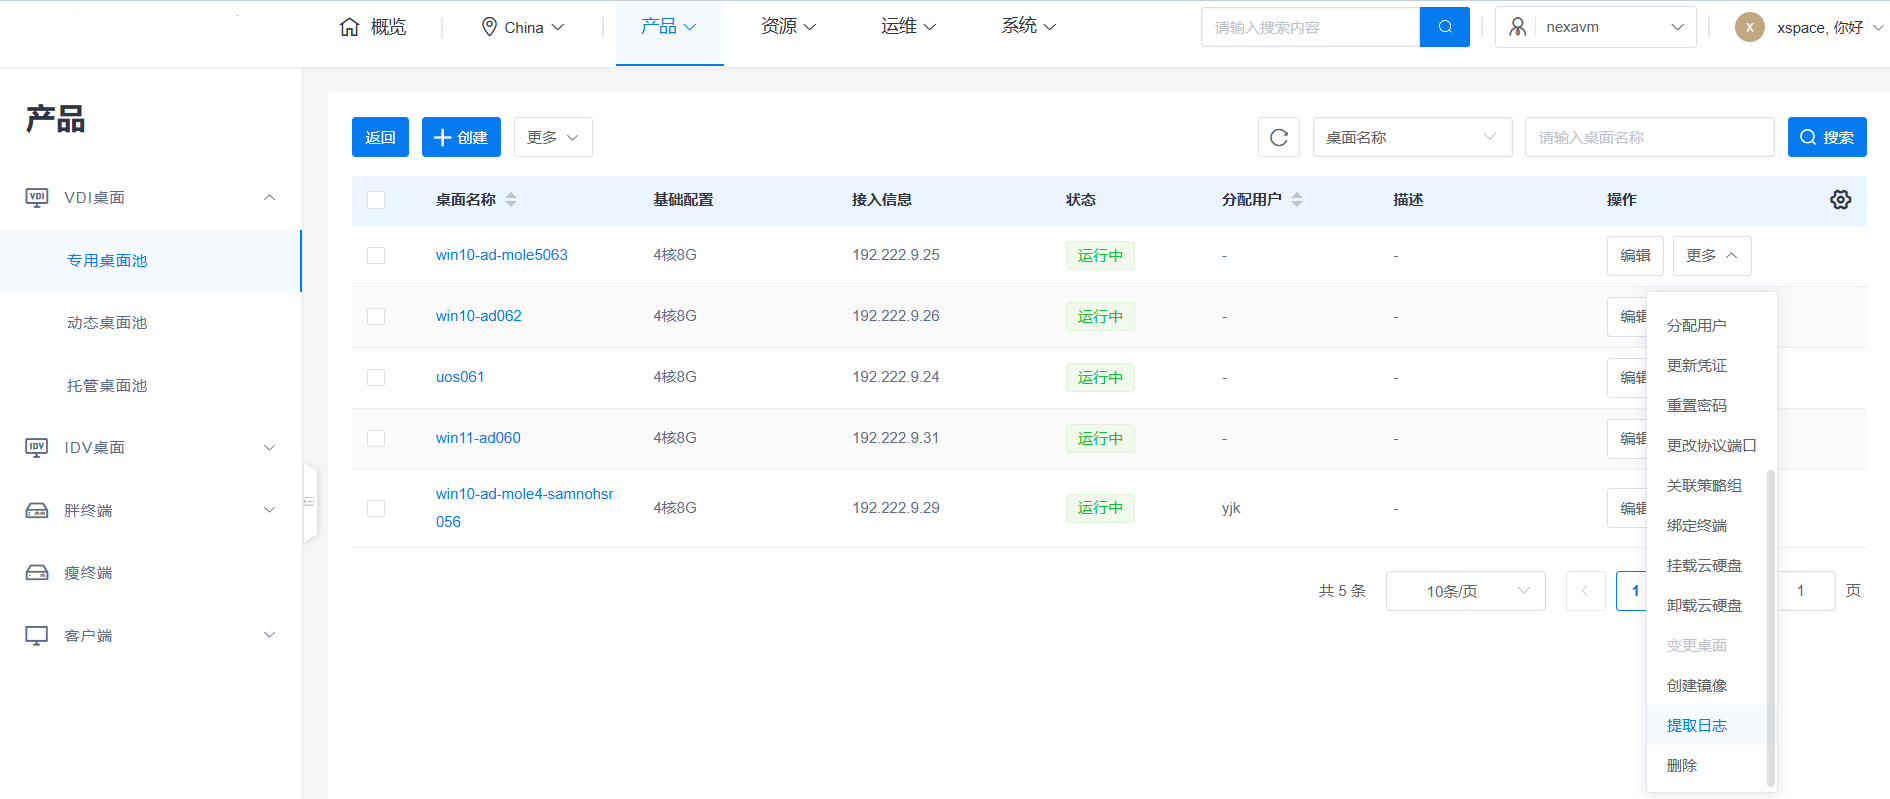
4.3 Extract Mole Logs
In the management backend's desktop operations, click "Extract Logs", select Mole for content, download and view the internal execution logic.

5. Frequently Asked Questions (FAQ)
-
Error 1: Reserved storage in use
Error in
setupact.log:Error SYSPRP Sysprep_Clean_Validate_Opk: Audit mode cannot be turned on if reserved storage is in use. An update or servicing operation may be using reserved storage.; hr = 0x800F0975Solution: Log in to the Windows console, perform a full Windows system update and restart, then recreate the image.
-
Error 2: AppxPackage removal failed (common in Win11)
Error in
setupact.log:Error SYSPRP Package Microsoft.Ink.Handwriting.Main.en-US.1.0.1_0.850.1840.0_x64__8wekyb3d8bbwe was installed for a user, but not provisioned for all users. This package will not function properly in the sysprep image. Error SYSPRP Failed to remove apps for the current user: 0x80073cf2. Error SYSPRP Exit code of RemoveAllApps thread was 0x3cf2. Error SYSPRP ActionPlatform::LaunchModule: Failure occurred while executing 'SysprepGeneralizeValidate' from C:\Windows\System32\AppxSysprep.dll; dwRet = 0x3cf2 Error SYSPRP SysprepSession::Validate: Error in validating actions from C:\Windows\System32\Sysprep\ActionFiles\Generalize.xml; dwRet = 0x3cf2 Error [0x0f0070] SYSPRP RunDlls:An error occurred while running registry sysprep DLLs, halting sysprep execution. dwRet = 0x3cf2 Error [0x0f00d8] SYSPRP WinMain:Hit failure while pre-validate sysprep generalize internal providers; hr = 0x80073cf2Solution: Log in to the Win11 master machine, execute the following command in Command Prompt with administrator privileges, then recreate the image:
bash
powershell -ExecutionPolicy Bypass -Command "Get-AppxPackage -AllUsers | Where-Object { $_.Name -like \"*Microsoft.Ink.Handwriting.Main*\" } | Remove-AppxPackage"