Image Creation
The initial source of cloud desktop images is the ISO file provided by the operating system vendor. Since the process of installing the operating system and configuring the environment from a raw ISO is cumbersome, and image files are large (usually 10G~30G or more), with repetitive creation processes, we usually recommend secondary processing based on already created QCOW2 image files in practice to improve deployment efficiency.
1. Image Operating System Requirements
-
Windows:
- Windows 7 x64 SP1
- Windows 10 x64 (recommended 22H2 version)
- Windows 11 x64 (recommended 23H2 version; higher versions like 24H2/25H2 currently have some compatibility issues, which will be provided after resolution in subsequent versions)
-
Linux:
- Ubuntu 22.04 or higher
- UnionTech 1060 or higher
- Kylin V10 SP1 or higher
- Deepin 20.6 or higher
- NfsDesktop 5.0 or higher from China Science and Technology Fangde
Important Tip:
For supported operating systems and CPU architectures, see Product Overview -> Technical Architecture -> Agent -> 3. Supported Operating Systems and CPU Architectures section. We currently only pre-build some commonly used images. If the image you need is on the support list but not pre-built by us, please contact vendor technical support. We will assist you in completing the image creation from ISO to QCOW2 (for KVM virtualization). Note: We do not guarantee image creation for non-QCOW2 formats.
2. Image Creation Process Suggestions
If your business truly requires creating VM images based on original ISO files officially released by the OS vendor, as the steps involve complex underlying driver loading and system initialization, please be sure to refer to our "VDI Image Creation Manual" provided in the version release directory. This manual provides detailed illustrated steps to guide you through the conversion from ISO to QCOW2 images.
Based on an existing base image, the recommended secondary processing flow is as follows:
- Resource Ingestion: Upload the配套 base image file to the underlying cloud platform and synchronize the image resources at the added cloud platform.
-
Create Dedicated Desktop: Create a "dedicated desktop pool" in xSpace and create a dedicated desktop based on this base image.
Core Tip: It is crucial to ensure that the virtual machine becomes a "desktop" object in xSpace. If a virtual machine is merely created directly on the IaaS platform, its internal agent components (Mole) will not be accepted by the management component even if configured to point to it, leading to a failure in establishing communication.
-
Customization Operations: Enter the desktop via the Web console or remote tools and perform the following operations:
- Perform deep optimization of the operating system as needed.
- Update agent components (see below for details).
- Install QGA:
qemu-guest-agentmust be installed. The system relies on this component for subsequent "reset password" and other commands executed via the cloud platform. - Install Platform Plugins: If the underlying cloud platform is ZStack, etc., you also need to install its officially provided enhanced tool packages similar to
vmtools. - Install various application software and personalized configurations required for business.
- Save Image:
- Method A: In the xSpace tenant console, perform the "Create Image" operation on this cloud desktop. This image will be used as a custom image for that tenant.
- Method B: Save it as a new image based on this virtual machine in the underlying cloud platform, and then import it as a system image (for use by all tenants) by "Synchronize Image" in the xSpace system console.
3. Update xSpace Agent Components
The agent component is the core for achieving desktop management and protocol connection. Since the provided base images usually come with an older version of Mole pre-installed, it must be updated to a version matching the current management component before creating a new image.
3.1 Preparation
Before operation, please ensure that the system administrator has uploaded the latest agent installation package in the System Console -> Version Management -> Agent Versions section and set it as the Default Version.
3.2 Update Process (Recommended via Mole Automatic Upgrade)
3.2.1 Configure Pointing and Connection
Run the Mole configuration tool inside the desktop to point Mole to the IP address of the xSpace master management node.
-
Windows Desktop:
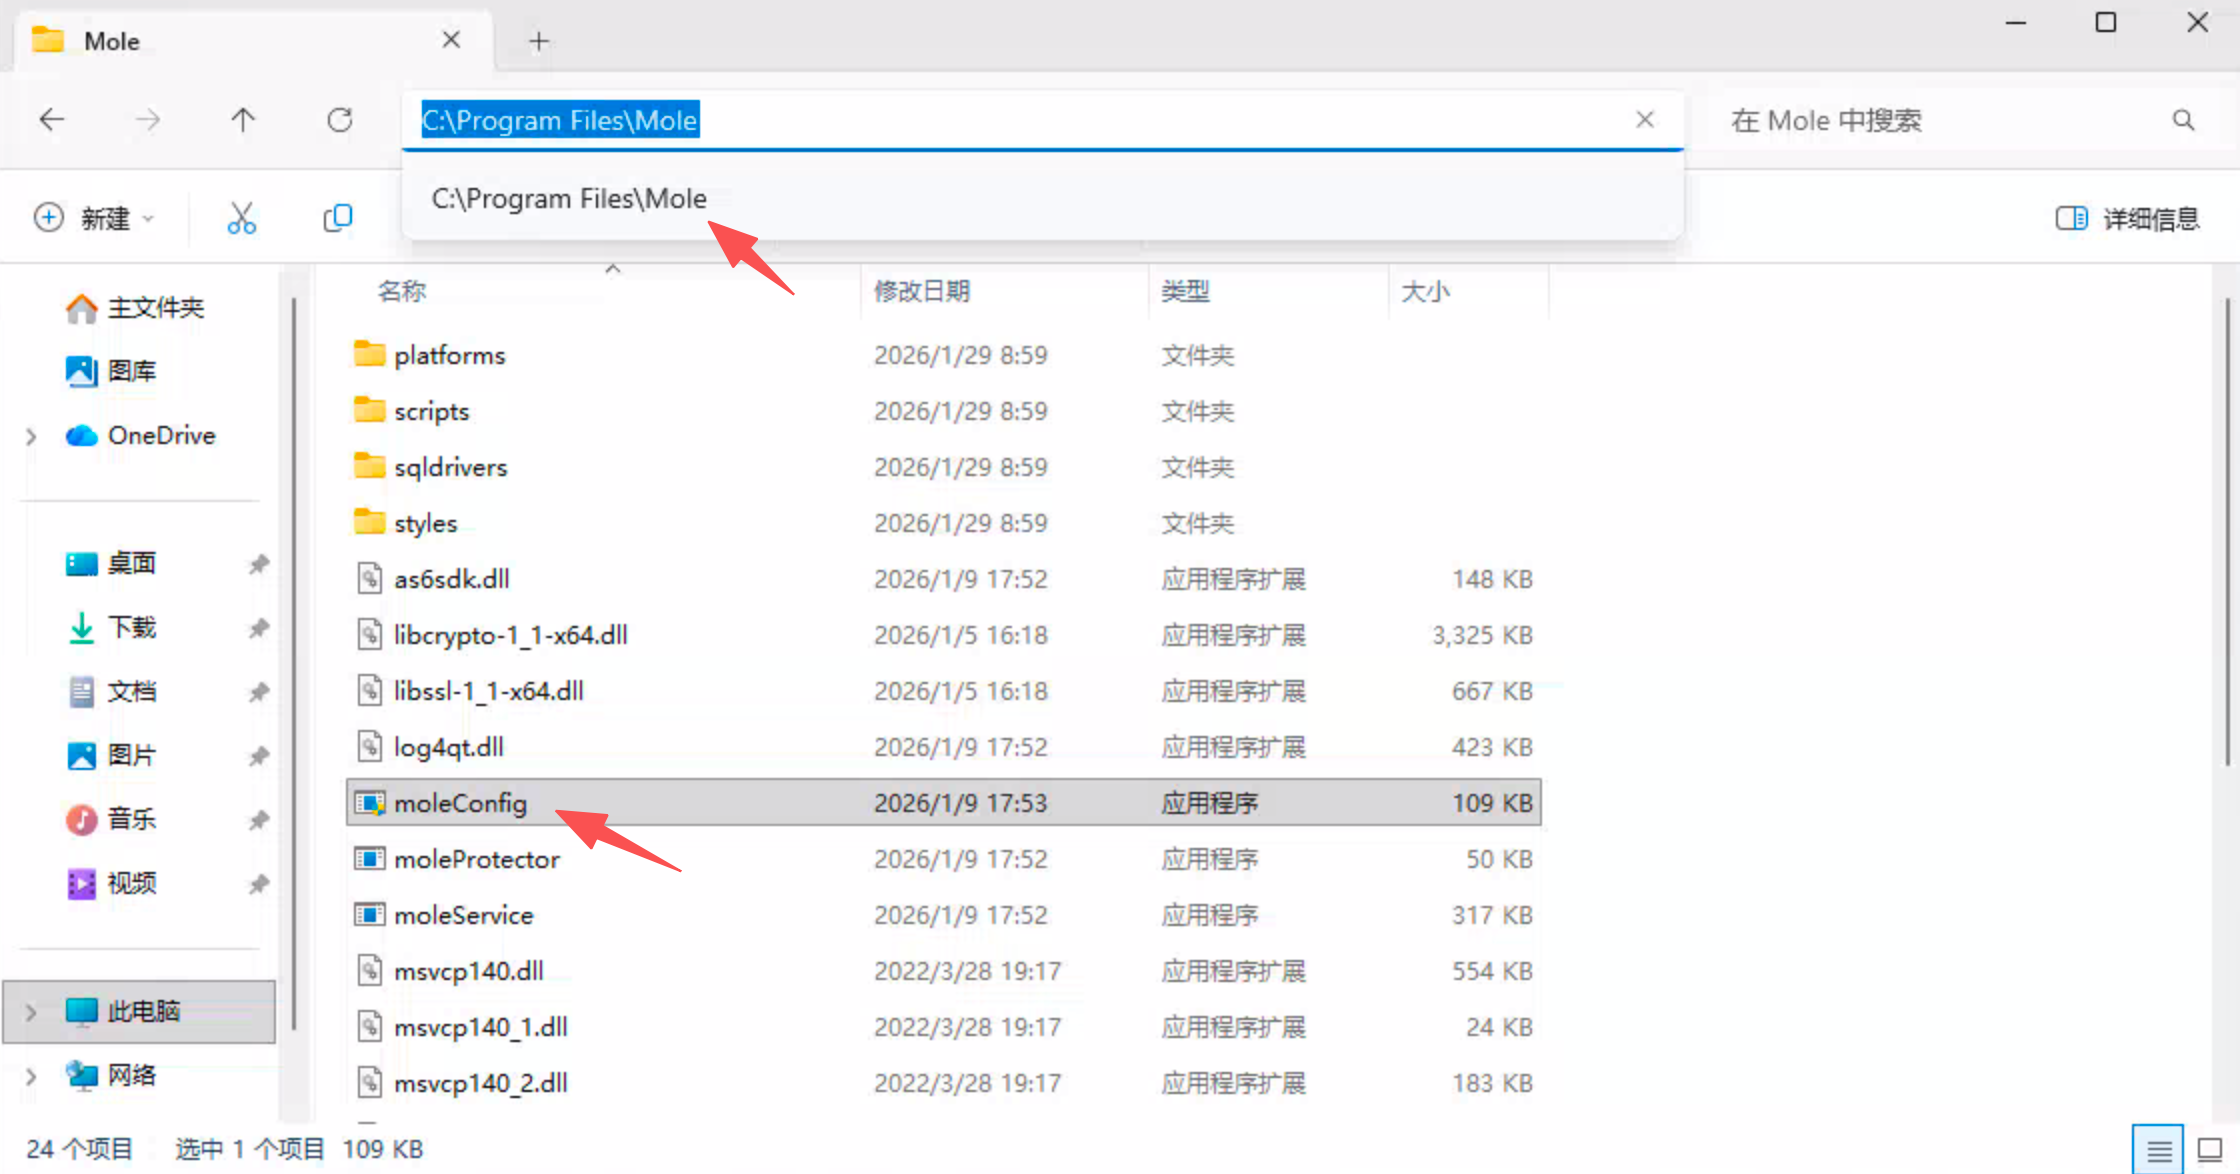
- File Path:
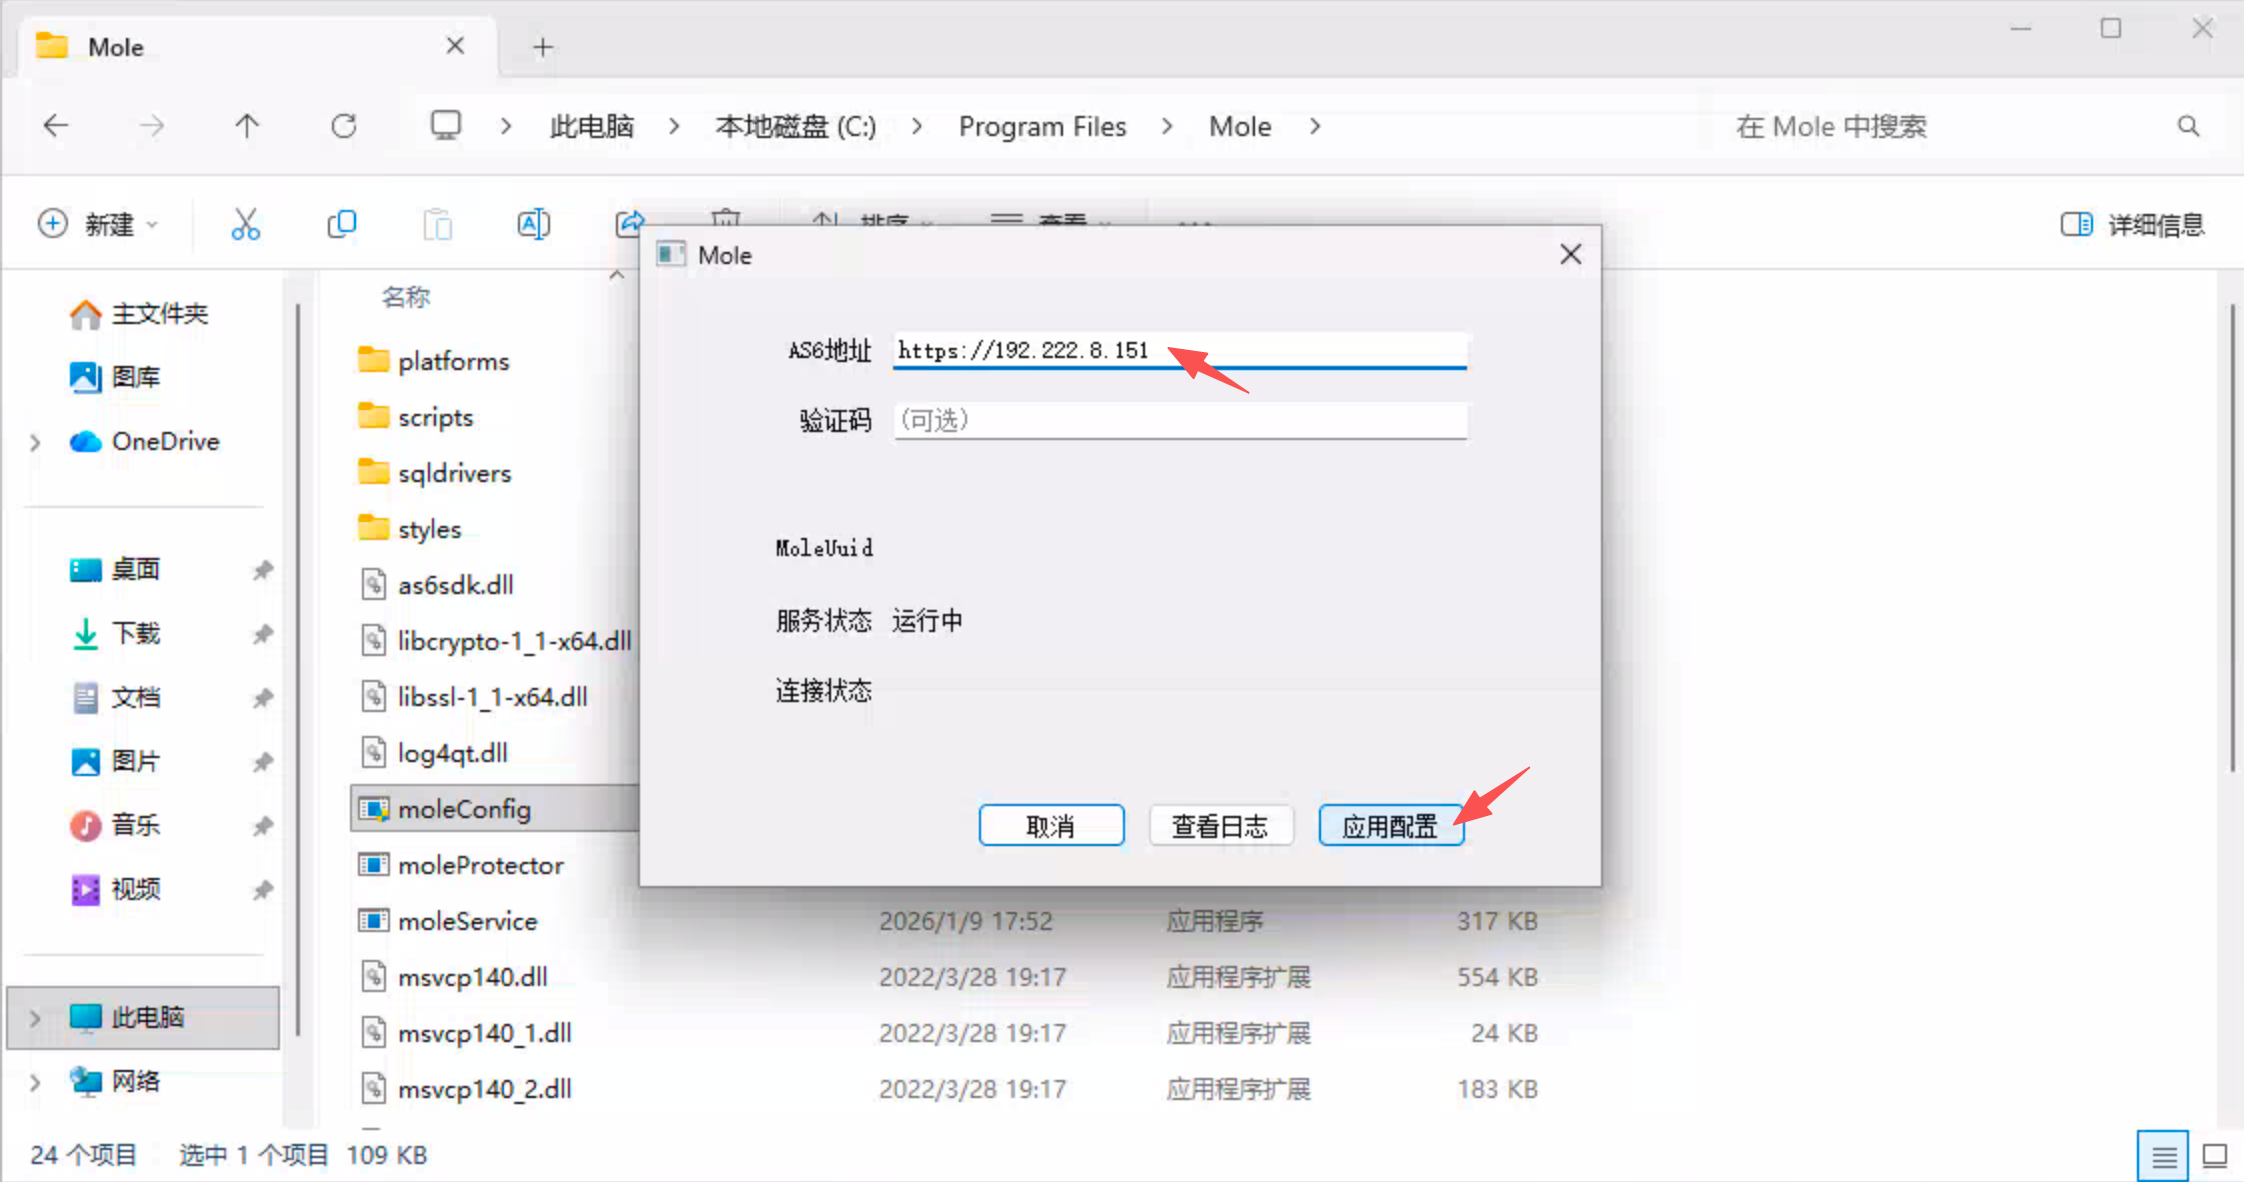
C:\Program Files\Mole\moleConfig.exe - Operation Instructions: In the Mole configuration interface, fill in the IP address of the master management node in the AS6 Address field and click Apply Configuration.
- File Path:
-
Linux Desktop:
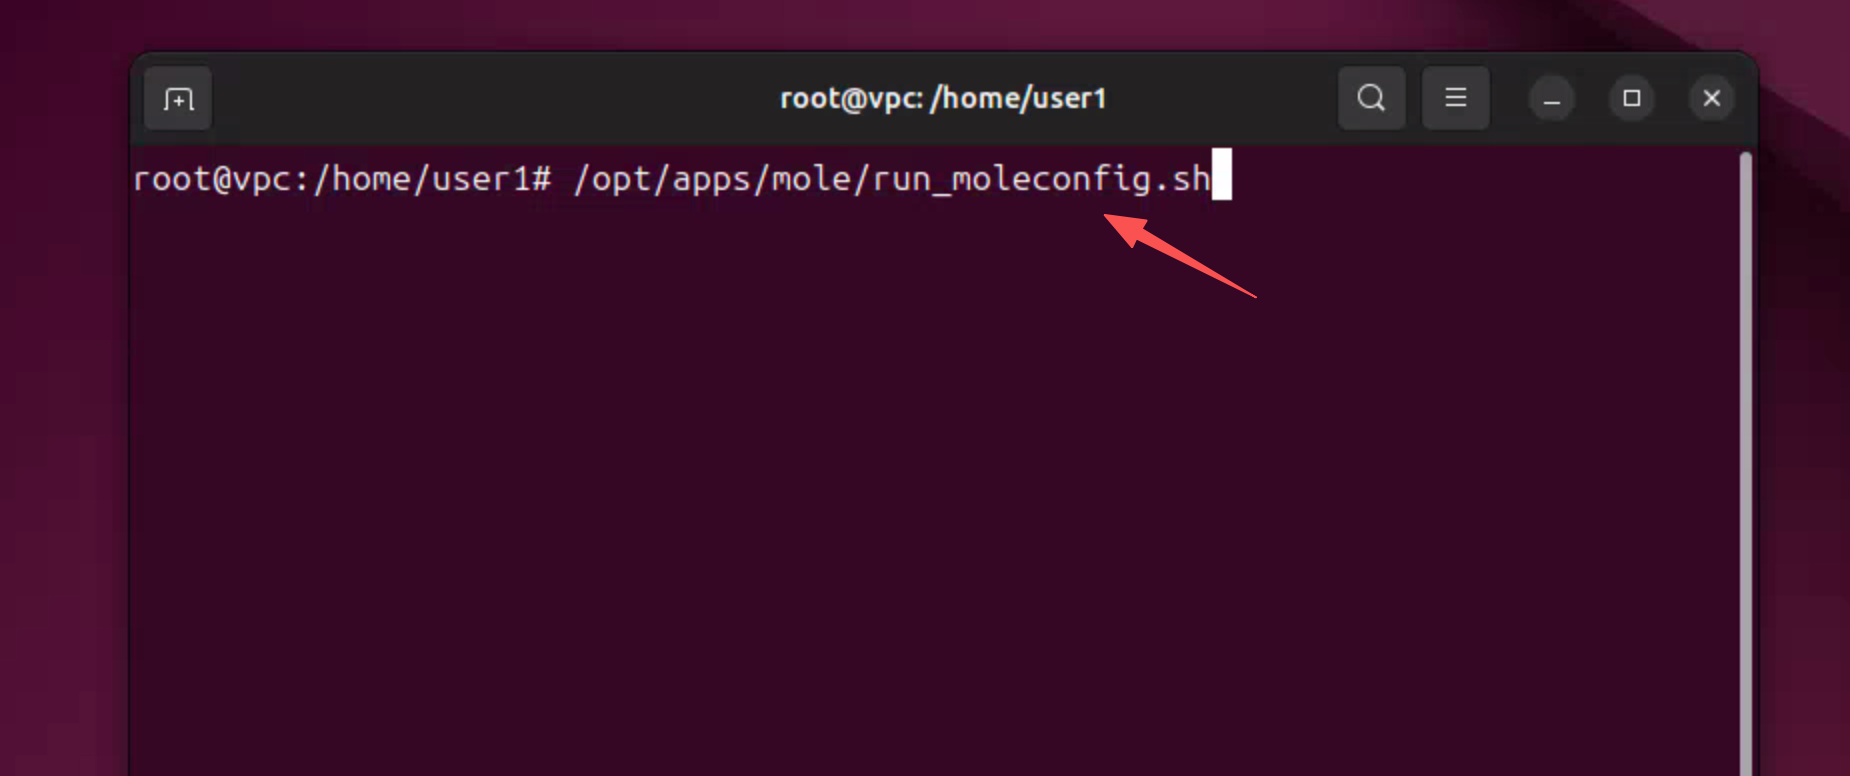
- File Path:
/opt/apps/mole/run_moleconfig.sh - Operation Instructions: Please ensure to run with sudo privileges. The configuration logic and status check are similar to Windows.
- File Path:
3.2.2 Status Confirmation and Automatic Upgrade
-
Status Check: After applying the configuration, the Mole service will automatically restart. After the restart is complete, if the connection status shows
Connected to AS6, it indicates that the communication has been successfully established.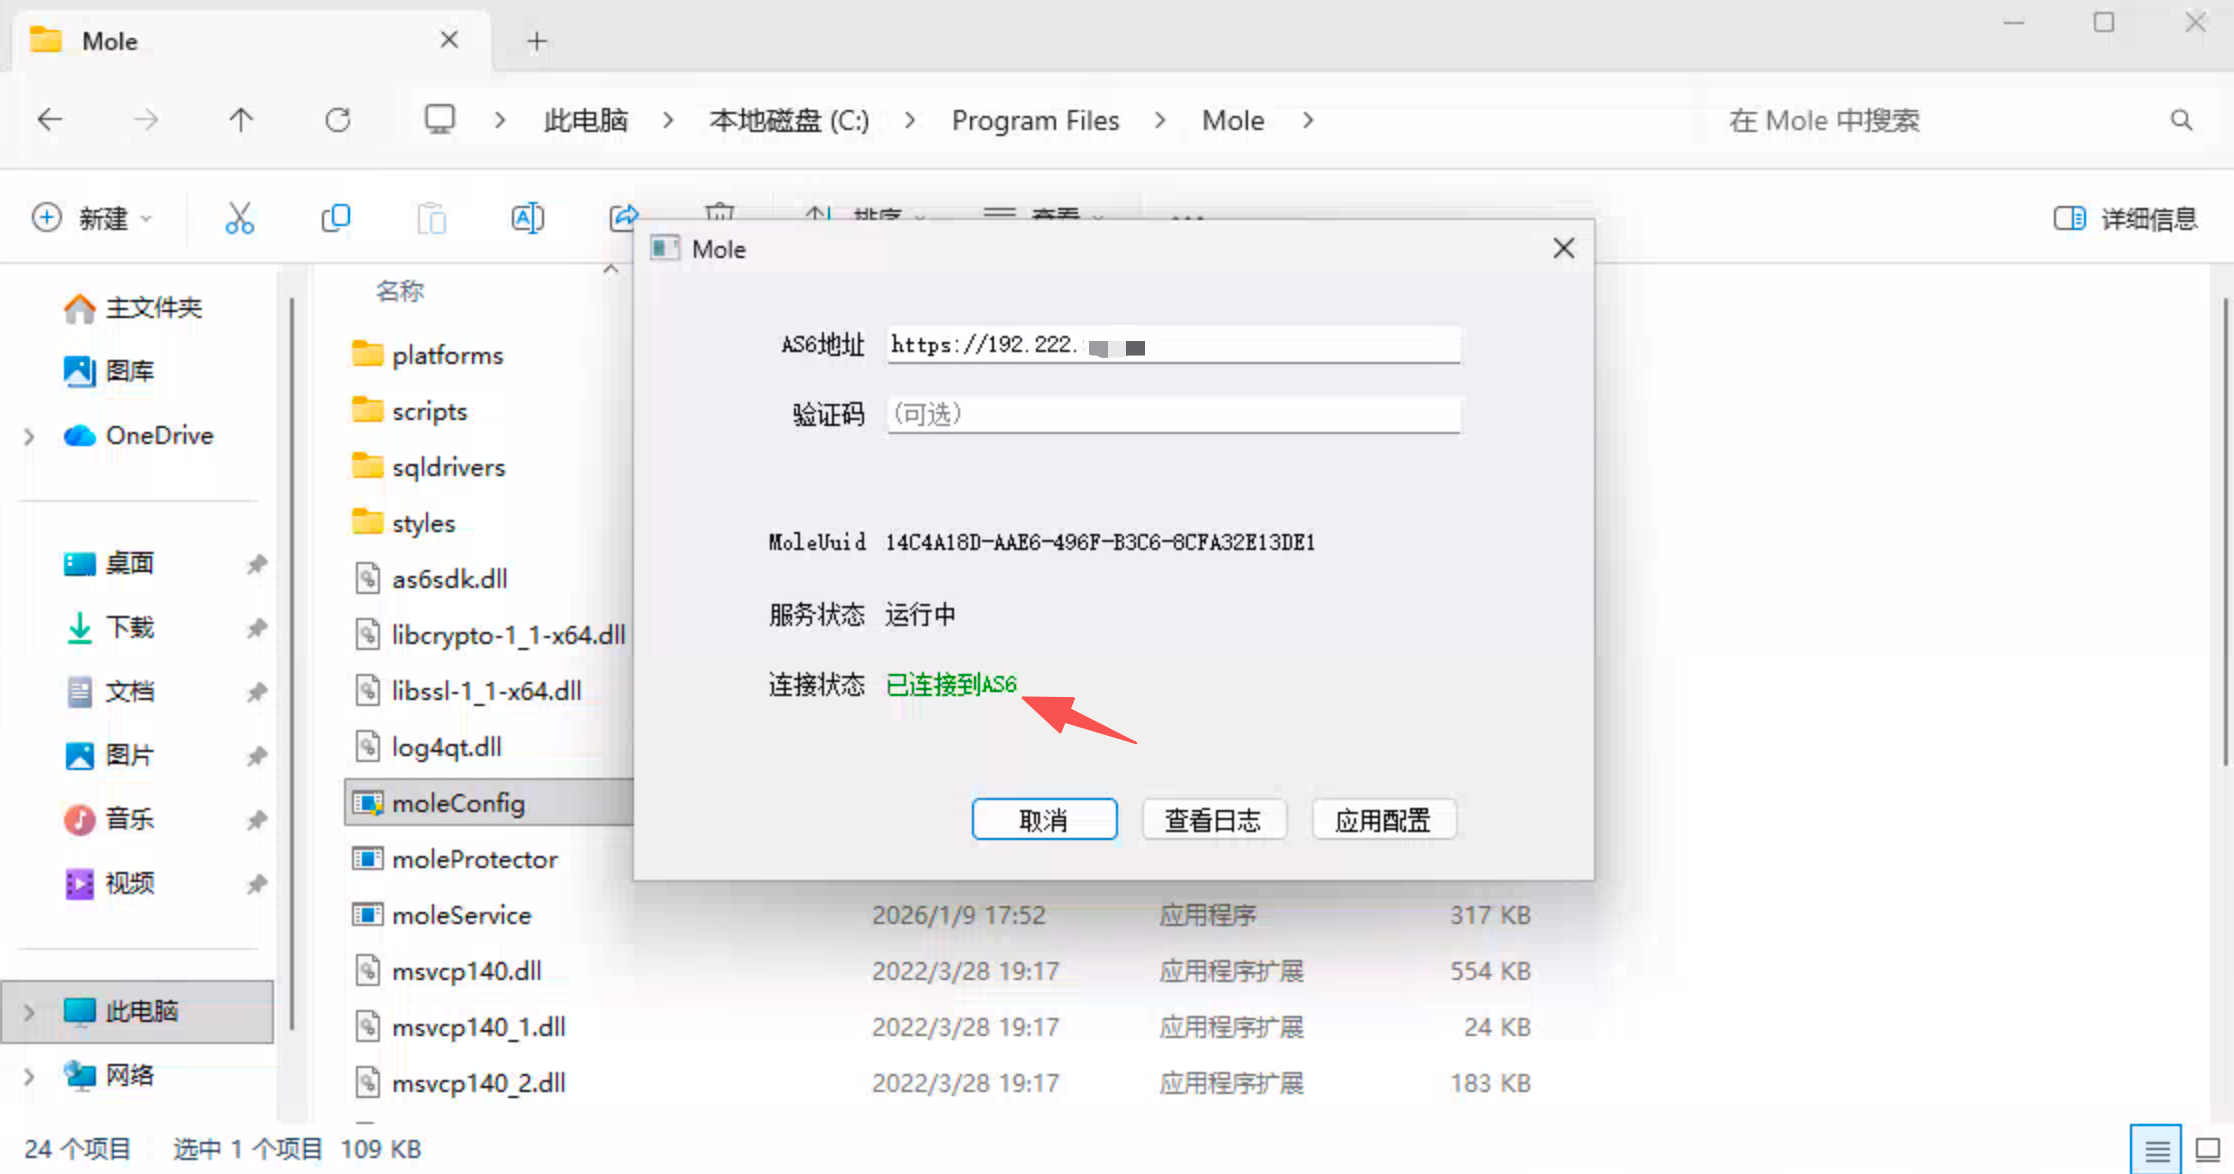
-
Trigger Upgrade: After successfully establishing contact, Mole will automatically detect the default version of the management component and sequentially trigger the background silent upgrade process for HSRServer, USBRedirect, and Mole itself.
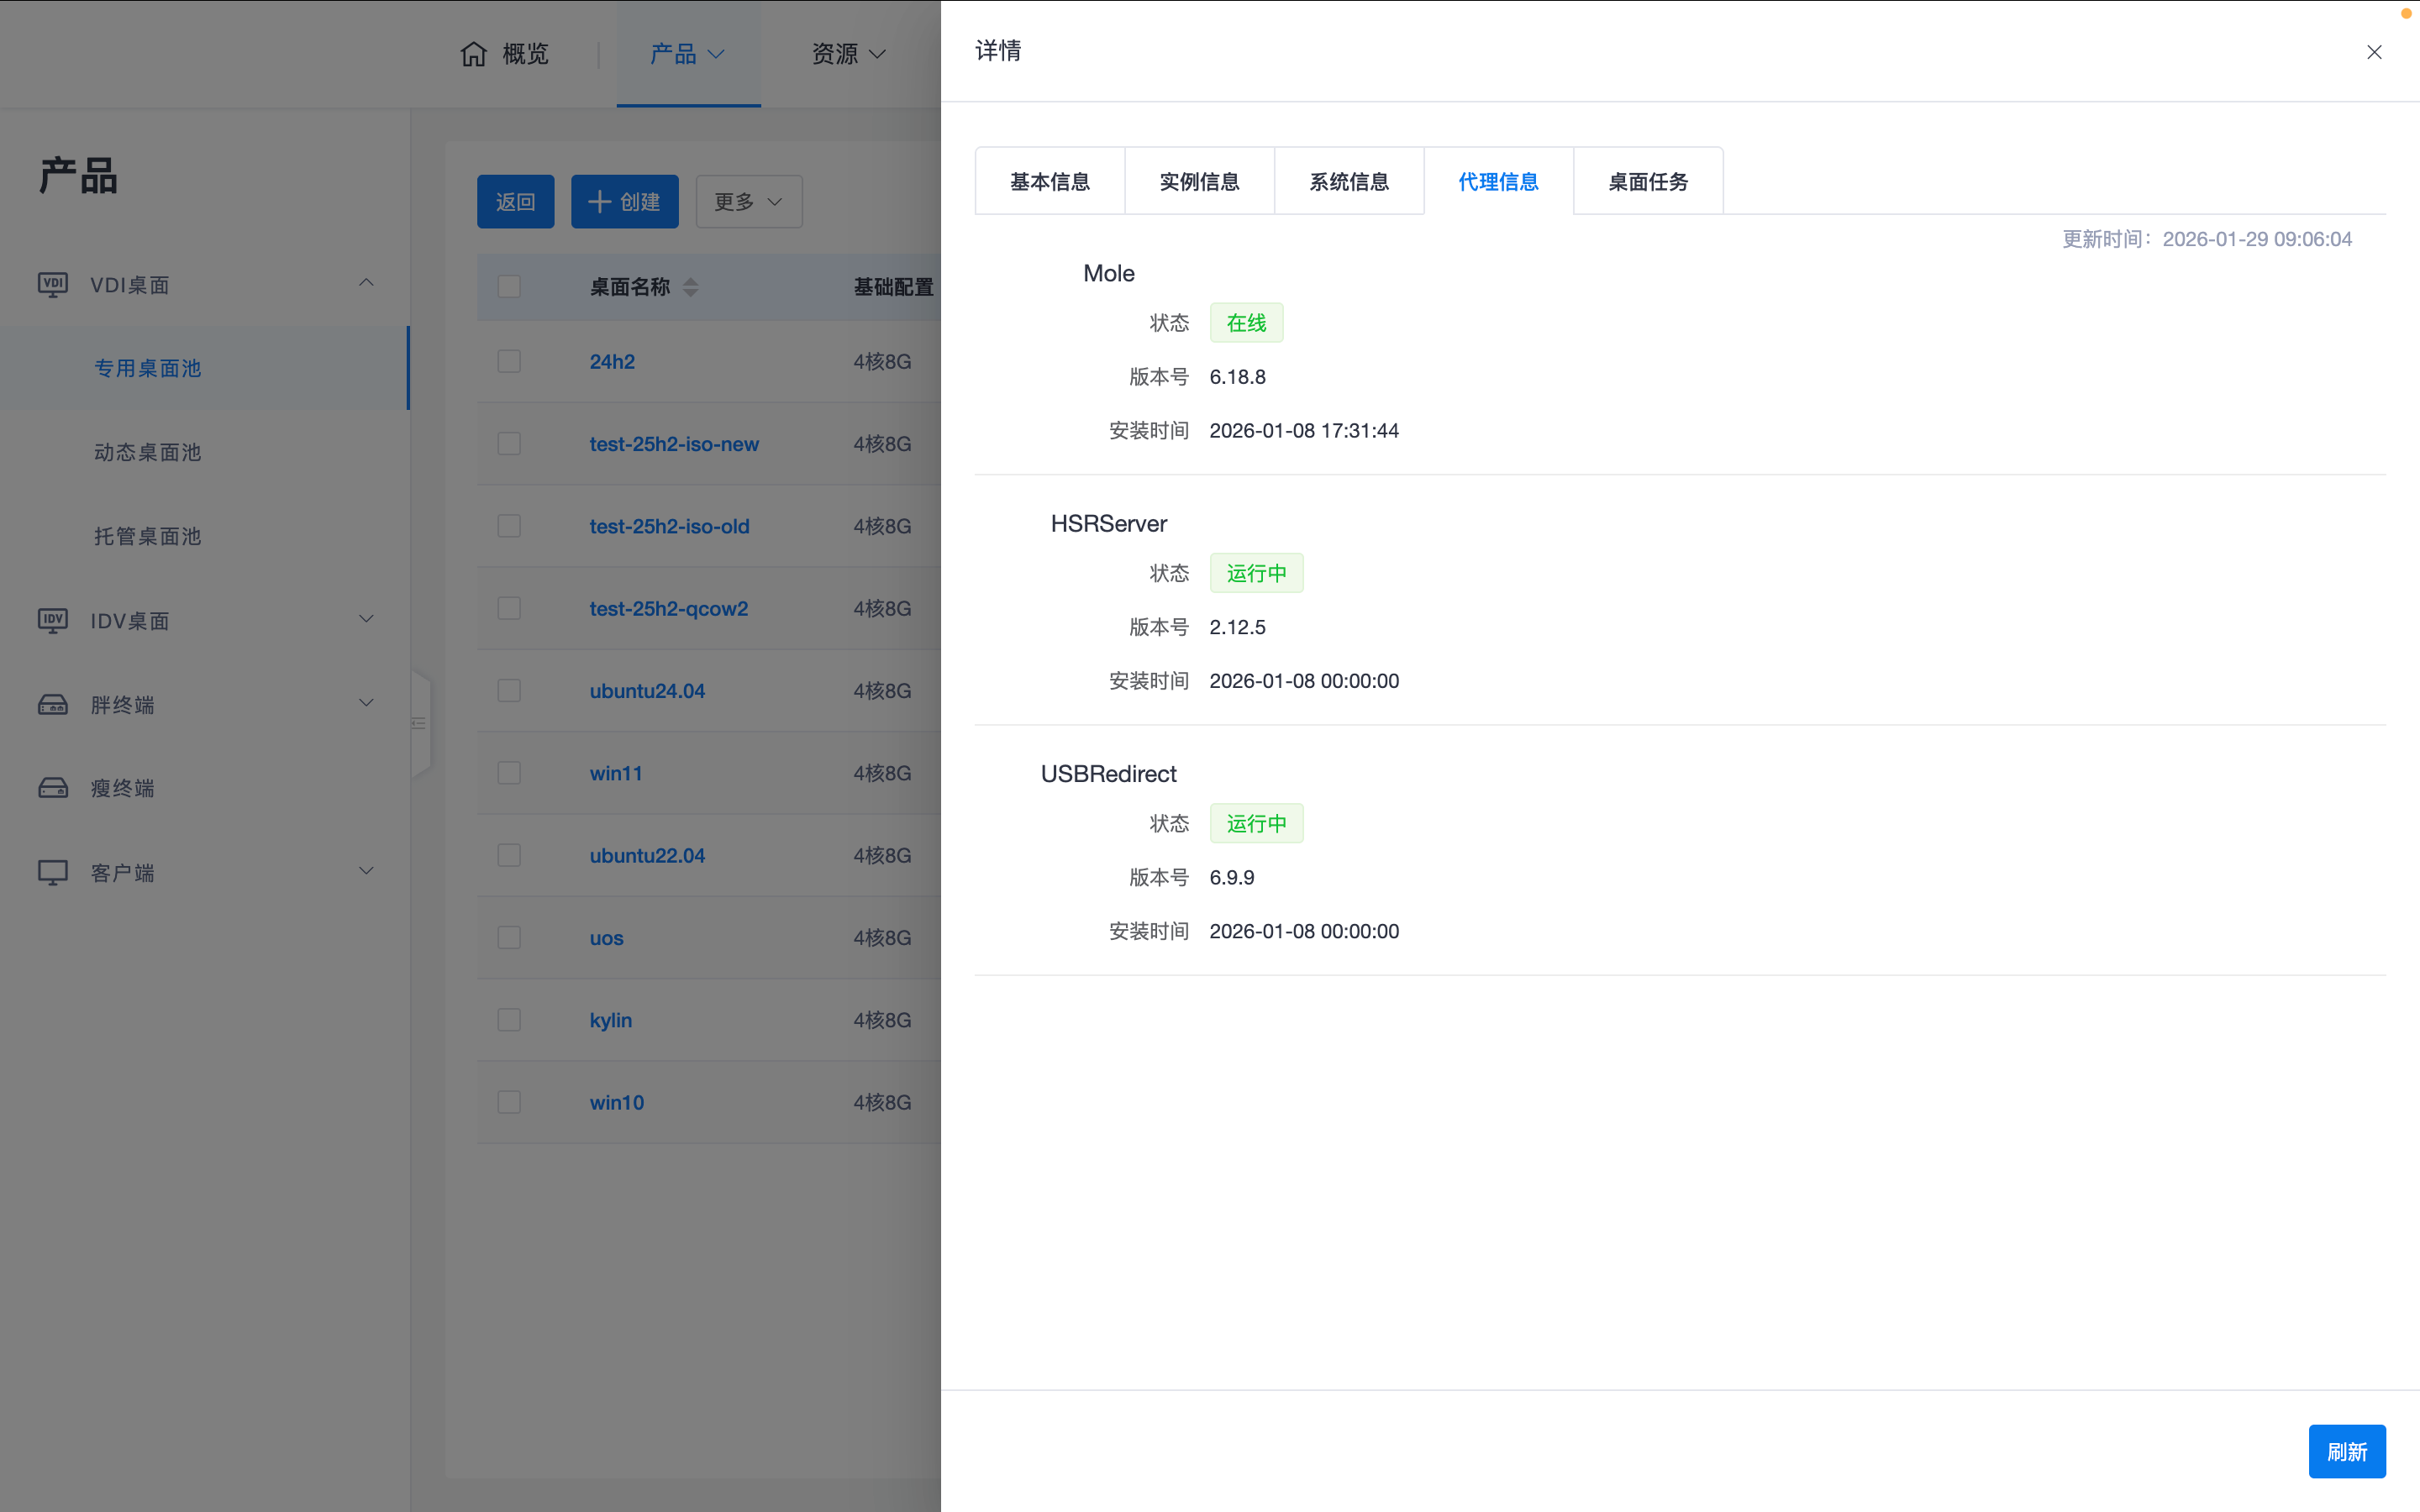
3.2.3 Check and Verify
Please wait patiently for 1-3 minutes. After the upgrade process is completed, check the version numbers in the Mole configuration interface. Confirm that the versions of Mole, HSRServer, and USBRedirect have been successfully upgraded to the "Default Version" specified by the management component.
4. Core O&M Notes
- Environment Consistency: Please ensure that the dedicated desktop from which the image is extracted has good network connectivity during image creation so that Mole can successfully complete component upgrades.
- Version Check: Before saving the image, be sure to confirm that all agent components are displayed as "Latest" or "Default Version" to avoid version mismatches when new images create desktops.
Note: Although it is possible to manually download and install the latest versions of Mole, HSRServer, and USBRedirect in the virtual machine, we recommend completing this through Mole's automatic upgrade mechanism to ensure consistency and stability of component versions.